Posted on Leave a comment

How to Find High Quality SVG Files for Cricut Projects

If you’ve ever downloaded an SVG for a Cricut project only to spend hours trying to fix it, you know how frustrating it can be. Low-quality or poorly designed files can ruin an otherwise fun crafting session, waste materials, and leave you second-guessing your purchase.

That’s why knowing how to find high quality SVG files is essential. When you start with clean, ready-to-cut designs, your projects turn out beautifully, and you spend more time creating and less time troubleshooting.

My Experience Finding High Quality SVG Files

I remember the first time I tried downloading SVGs for a Cricut project—I was so excited to make a custom gift, but the file was a mess. The lines were jagged, the layers were all wrong, and I spent more time fixing the design than actually crafting. It was frustrating and honestly made me want to give up.

Over time, I learned the hard way that not all SVGs are created equal. Now, I know exactly what to look for to make sure every file I download is a high quality SVG that will cut perfectly the first time. Once I figured out the process, crafting became fun again—and I could actually enjoy seeing my projects come to life without all the wasted time and materials.

Transform Your Crafting with High Quality SVG Files

Imagine opening an SVG file and being able to start cutting immediately—no jagged lines, no messy layers, no wasted materials. That’s what happens when you learn how to consistently find high quality SVG files.

By following the right steps, you’ll move from spending hours fixing files to spending hours creating beautiful projects. Your designs will look professional, your Cricut cuts will be precise, and you’ll feel confident choosing files for any occasion—whether it’s a holiday, a custom gift, or a seasonal craft.

Once you know how to spot high-quality SVGs, every project becomes smoother, faster, and more enjoyable. Crafting will feel less like a headache and more like the relaxing, creative experience it’s meant to be.

How I Help You Find High Quality SVG Files

Hi, I’m Chaniece, and I help Cricut crafters save time and frustration by guiding them to high-quality designs and resources. I know how overwhelming it can feel to scroll endlessly through file options, wondering if the SVG you’re about to download will even work.

Through my experience designing and testing files, I’ve developed strategies to quickly find high quality SVG files that cut perfectly and make your projects look amazing. Whether you’re creating gifts, decorations, or custom items to sell, I’m here to show you how to skip the mistakes and enjoy crafting more.

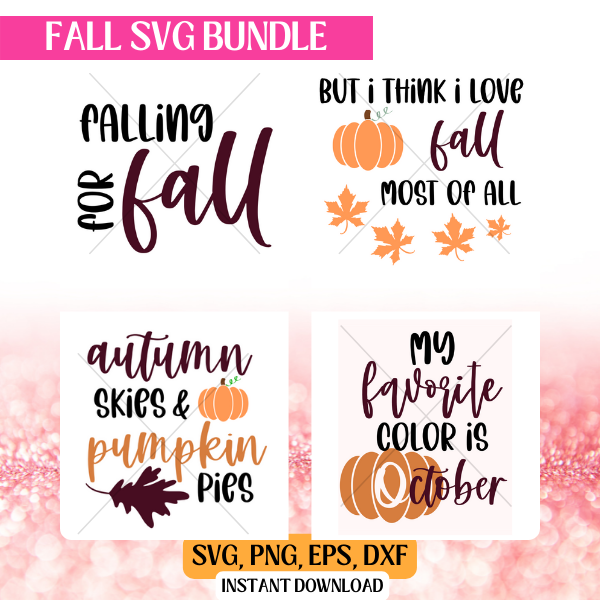
Get Your Hands on High Quality SVG Files Today

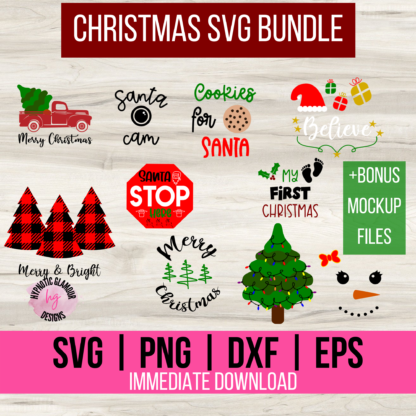
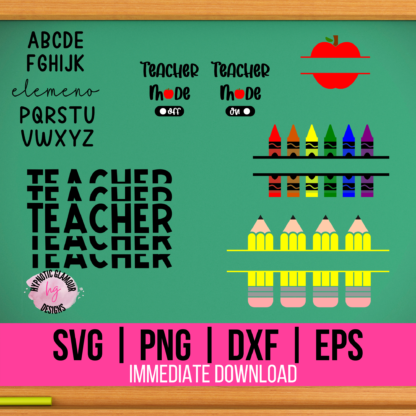
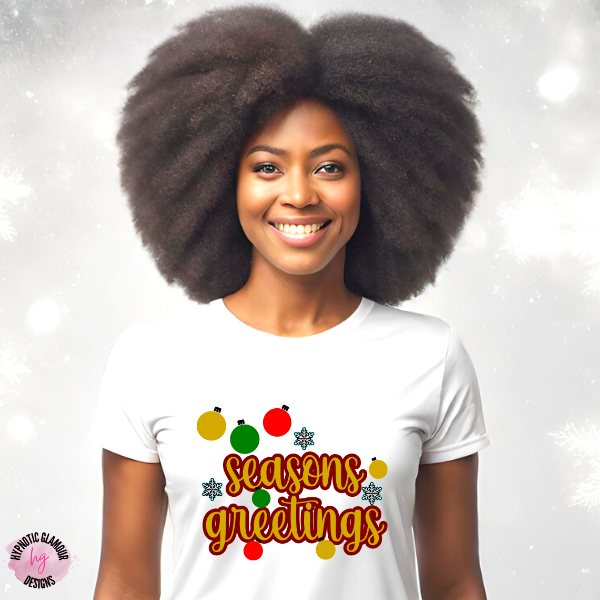
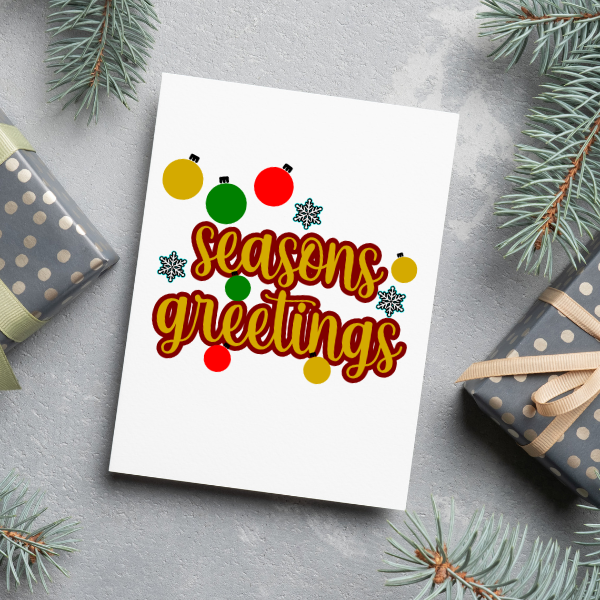
To make your crafting projects even easier, I’ve bundled some of my favorite designs into an SVG bundle that’s ready to cut. Every file in this bundle is a high quality SVG, carefully tested to ensure smooth cuts, clean layers, and professional results.

Whether you’re making a holiday project, a custom gift, or a seasonal decoration, this bundle saves you time and frustration by giving you files that just work. You can download it instantly and start creating without worrying about messy files or broken designs.

How High Quality SVG Files Make Your Cricut Projects Easier

What is a high quality SVG?

A high quality SVG is a vector file designed specifically for cutting machines like Cricut. It has clean lines, properly organized layers, and is easy to manipulate in Cricut Design Space. These files are ready to cut as-is, saving you time and effort.

Using high quality SVG files takes the stress out of crafting. You’ll feel confident, creative, and excited to start each project because you know the files will cut perfectly. No more wasted materials, no more frustration with messy designs, just smooth, enjoyable crafting sessions.

Why high quality SVGs are important

If you don’t use high-quality SVG files, you risk:

  • Jagged cuts or broken designs
  • Spending hours fixing the file instead of creating
  • Wasting materials and money on failed projects

Getting the right files from the start ensures your projects are successful and enjoyable.

How you can start using high quality SVGs

You can start using high quality SVG files today by:

  • Downloading my tested SVG bundle (linked above)
  • Using reputable sources like Creative Fabrica, Design Bundles, or LoveSVG
  • Following a simple checklist to ensure each file meets quality standards before cutting

By using the right files, you’ll save time, avoid frustration, and make your Cricut projects look amazing every time.

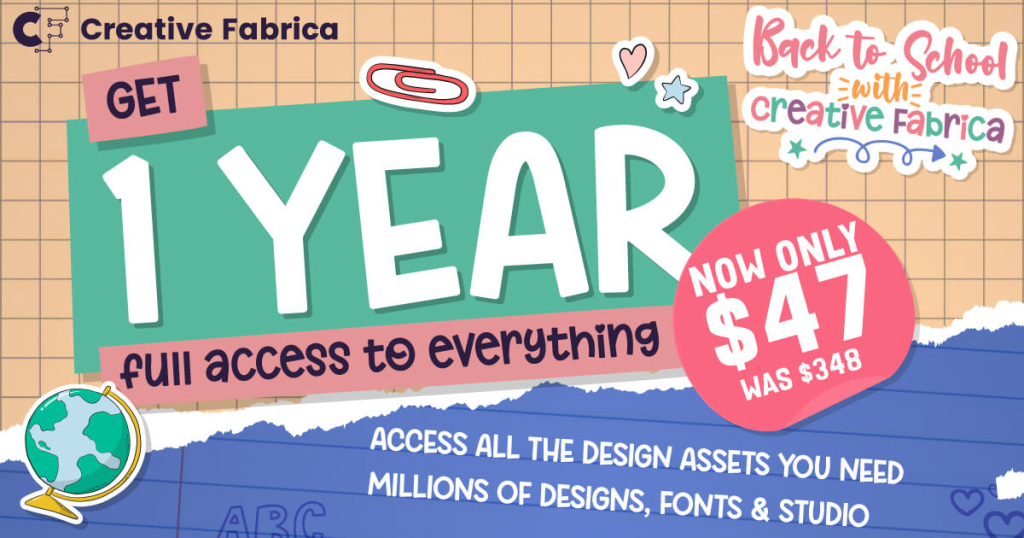
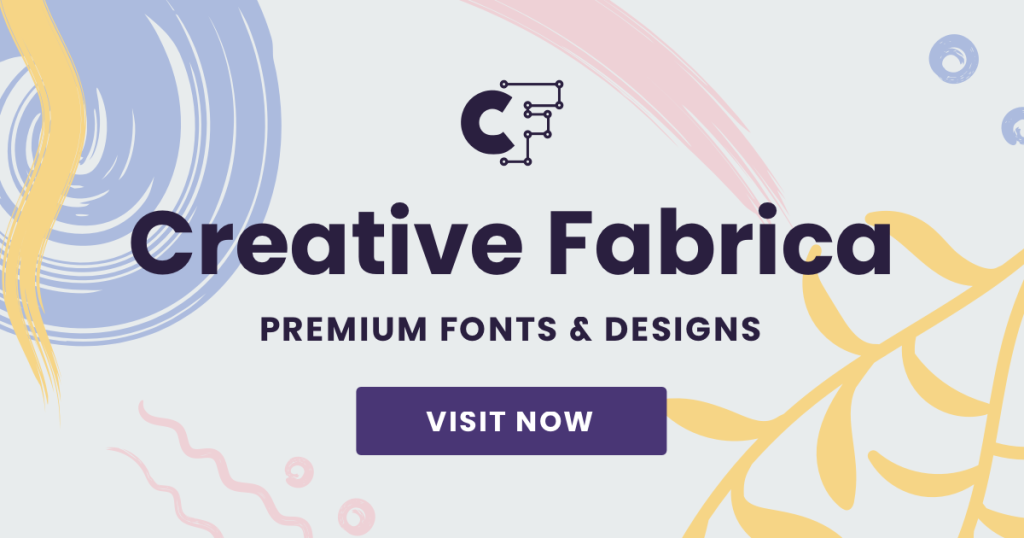
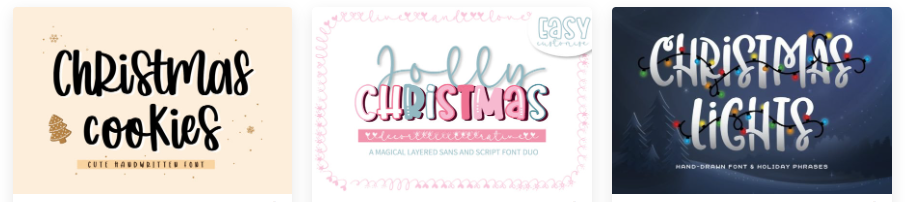
Boost Your Projects with Creative Fabrica Fonts

One way to make your Cricut designs truly stand out is by pairing them with beautiful, well-designed fonts. I personally use Creative Fabrica for all my font needs because it’s packed with high-quality options that work perfectly with your SVG files.

With a Creative Fabrica yearly subscription, you get access to thousands of fonts, from playful handwritten styles to elegant scripts. This makes it easy to match your high quality SVG designs with fonts that fit your project’s theme or mood. Using the right font can elevate a simple design into a polished, professional-looking craft.

Whether you’re making cards, t-shirts, or custom signs, Creative Fabrica fonts save you time and frustration — just like using high quality SVG files. You can try a free trial or subscribe to access the full library and start crafting confidently today.

What’s Your Biggest Challenge with SVG Files?

I want to hear from you! When it comes to using SVGs for your Cricut projects, what’s the biggest challenge you face?

Is it:

  • Finding high quality SVG files?
  • Fixing messy downloads?
  • Choosing the right file format?
  • Matching fonts to your designs?

Drop your answer in the comments — even one word works! Your feedback helps me create more content and tutorials that solve your exact crafting problems.

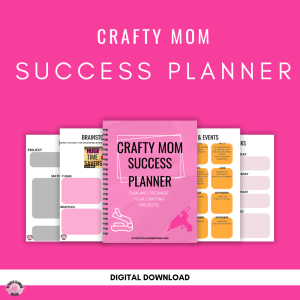
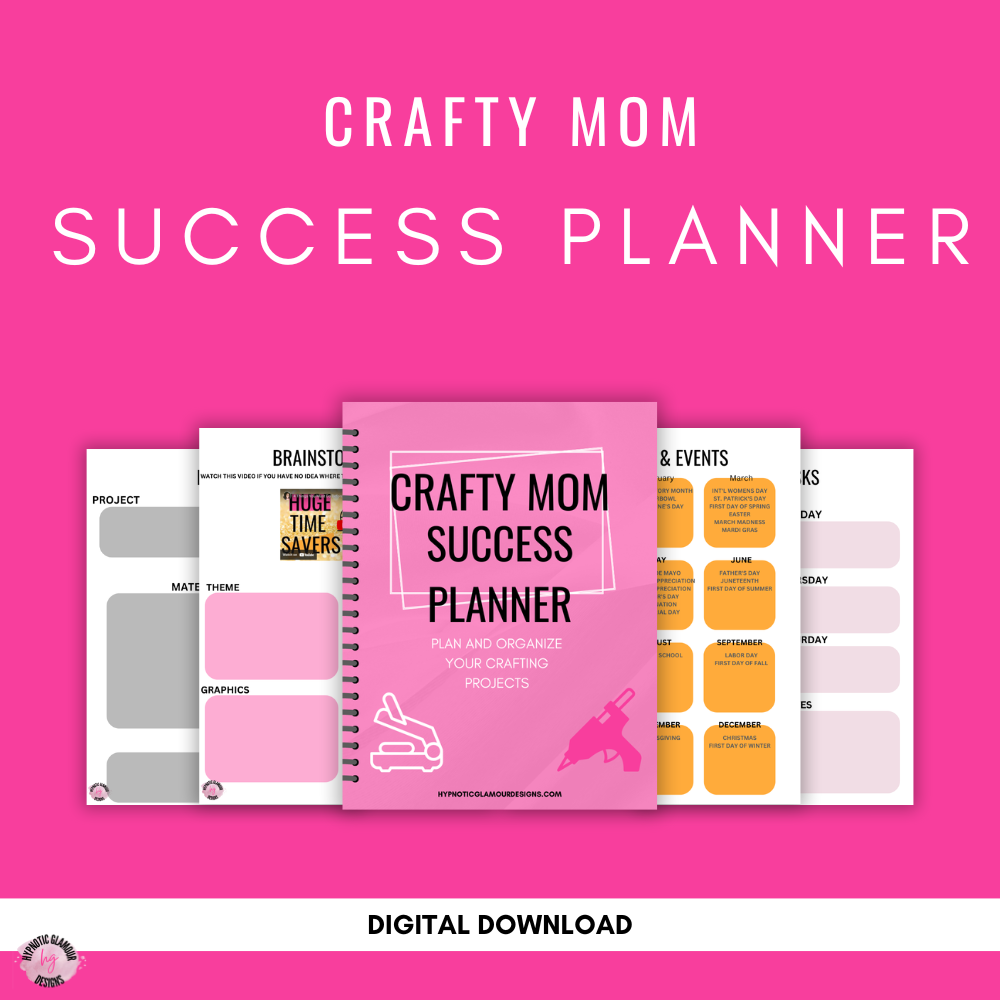
Stay Organized with the Crafty Mom Success Planner

To make your crafting projects even smoother, I recommend grabbing the Crafty Mom Success Planner. It’s a free digital planner designed to help you stay organized, plan your projects, and track your crafting progress — perfect for keeping all your high quality SVG files, font ideas, and project steps in one place.

With the planner, you can:

  • Break down multi-step projects into manageable tasks
  • Track your SVG downloads and font pairings
  • Stay on top of deadlines for gifts, holidays, or seasonal crafts

Grab your free planner today and take the stress out of your craft planning — so you can focus on creating and enjoying your projects!

Grab Your Ready-to-Use SVG Bundle

If you’re ready to skip the frustration and start creating immediately, my SVG bundle is the perfect solution. Each file in this bundle is a high quality SVG, carefully tested to cut perfectly with Cricut machines.

Whether you’re making cards, t-shirts, home decor, or seasonal crafts, this bundle saves you time and ensures your projects look professional from start to finish. Download it instantly and have fun crafting without the headache of messy or unreliable files.

Next Step: The #1 Tool to Plan Your Projects

Now that you know how to find high quality SVG files and pair them with the perfect fonts, the next step is to get organized and plan your projects efficiently.

Check out the Crafty Mom Success Planner, where you can:

  • Track your SVG downloads and font choices
  • Break down multi-step projects into manageable tasks
  • Stay on schedule for gifts, holidays, or seasonal crafts

Click here to dive into the planner and make your crafting sessions smoother, faster, and more enjoyable!

Posted on Leave a comment

How to Choose the Perfect Cricut Fonts for Any Project

Stop Wasting Time Picking Cricut Fonts

Are you tired of spending hours scrolling through endless font options for your Cricut projects—only to feel overwhelmed and unsure which one will actually look good? Whether you’re making custom money card holders, gifts, or décor, the right font can completely transform your design. The problem? With so many choices out there, picking fonts for Cricut projects can feel frustrating and time-consuming.

My Cricut Fonts Struggle

When I first started making custom Cricut projects, picking fonts was honestly the most frustrating part. I’d have my design ready to go, but then I’d spend way too much time scrolling through endless font lists trying to figure out which one would actually look good. Half the time, I’d pick something, cut it out, and realize it didn’t match the vibe at all.

That’s why I created this simple three-step framework for choosing Cricut fonts. It’s the exact process I use now for my own projects, and it’s been such a game-changer. Instead of wasting time and feeling overwhelmed, I’m able to confidently pick fonts that perfectly match the style and emotion of my designs. And the best part? My projects look more cohesive and professional than ever before.

From Overwhelmed to Confident with Cricut Fonts

Once you start using this three-step framework for choosing Cricut fonts, everything about your projects changes. Instead of spending hours second-guessing your choices, you’ll know exactly how to find fonts that match your theme, style, and mood — every single time.

You’ll go from feeling overwhelmed by endless font options to feeling excited and confident about your designs. Your projects will look more polished and intentional, and you’ll save yourself so much time and frustration.

How to Master Cricut Fonts Without Feeling Overwhelmed

If you’ve ever sat down to start a Cricut project and found yourself completely overwhelmed by all the font choices, you’re not alone. I used to spend so much time scrolling through endless options, hoping I’d stumble across the “perfect” font — only to end up frustrated or second-guessing my pick.

That’s why I created a simple three-step framework for choosing Cricut fonts that takes all the stress out of the process. Whether you’re making a custom money card holder, designing a holiday project, or creating something totally unique, this method will help you quickly find fonts that look amazing and fit your theme.

By the end of this post, you’ll know exactly how to pick the right fonts for your projects — plus I’ll share a free guide with 10 of my go-to fonts that work perfectly for almost any Cricut design.

SVG Bundle to Pair with Cricut Fonts

Now that you know how to pick the perfect Cricut fonts, why not pair them with ready-to-use SVG designs? I release fresh SVG bundles filled with high-quality, clean files that are easy to customize with your favorite fonts.

These bundles are designed to save you time, reduce frustration, and help your projects look polished and professional — whether you’re using playful handwritten fonts, elegant scripts, or bold display fonts.

Use the perfect fonts + these ready-to-cut SVGs, and your Cricut projects will go from “just okay” to amazing in no time.

3 Steps to Choosing the Best Cricut Fonts

Picking the right font can transform your project from “okay” to “wow.” With the right Cricut fonts, your designs feel intentional, polished, and professional — and you’ll save time instead of second-guessing yourself or starting over.

Here’s the simple 3-step process I use for my own Cricut projects:

  1. Pick a Topic or Theme – Start by deciding what your project is about (holiday, special occasion, current trend).
  2. Create a Search Term – Combine your topic with the word “font” and search it on a site like Creative Fabrica (e.g., “Christmas font” or “wedding font”).
  3. Pick Your Font Style – Match your font to the emotion you want to convey: handwritten for playful, script for elegant, bold for modern.

Bonus Tip: Try using a font duo — two fonts designed to complement each other perfectly — to make your project look like it came straight from a pro designer.

Using the wrong font can make your project look messy or unprofessional, even if the SVG design is amazing. It can also waste your time and materials because you’ll keep cutting, testing, and redoing. When you follow this framework, you’ll know your fonts will work before you even start.

You can start implementing this framework right away by visiting Creative Fabrica to find fonts that fit your theme. To make it even easier, grab my Free Font Ideas Guide, where I’ve rounded up 10 fonts perfect for any Cricut project — you can download it instantly and use it as your go-to cheat sheet.

My Favorite Resource for Cricut Fonts

When it comes to finding high-quality Cricut fonts, my go-to resource is Creative Fabrica. They have thousands of fonts (including tons of font duos!) in every style imaginable — from elegant scripts to playful handwritten options — all curated and ready for your next project.

With a Creative Fabrica All Access Subscription, you don’t have to worry about paying for fonts one at a time or dealing with licensing confusion. Everything you download is commercial-use friendly, so you can confidently use these fonts in personal or small business projects.

Check out the Creative Fabrica All Access Subscription below to try some options today.

Biggest Cricut Fonts Challenge

I’d love to hear from you: what’s your biggest challenge when it comes to choosing Cricut fonts?

Drop your answer in the comments — just one word is fine! Your response will help me create future content that solves your exact problems.

Leave a Reply

Your email address will not be published. Required fields are marked *

Crafty Mom Success Planner

Planning your crafts doesn’t have to be stressful! My Crafty Mom Success Planner is a free digital tool designed to help busy crafters like you stay organized, track project steps, and manage deadlines — all in one place.

It pairs perfectly with choosing the right Cricut fonts: once you know which fonts to use, you can plan exactly how and when to use them in your projects, making everything smoother and more enjoyable.

Next Step: Finding Ready-to-Cut SVGs

Now that you know how to choose the perfect Cricut fonts, the next step is pairing them with ready-to-cut SVG designs that are high-quality and easy to use.

Check out this post where I cover four common mistakes crafters make when searching for designs and share a four-point checklist to ensure your SVGs are smooth, layered correctly, and perfect for Cricut.

[COMING SOON]
Posted on Leave a comment

Craft Planning: The Secret to Saving Time and Loving Your Projects

You love the thrill of starting a new craft project—picking colors, imagining the finished piece, maybe even thinking of how happy someone will be to receive it. But too often, that excitement turns into frustration: supplies are missing, designs don’t fit, or you waste precious time re-cutting materials.

That’s where craft planning comes in. With a simple framework, you can take control of your projects before you ever touch your vinyl or press “cut,” saving time, money, and headaches—while actually enjoying the creative process again.

How Craft Planning Changed My Own Projects

I’ll be honest—when I first started crafting, I was all about diving right in. I’d see an idea on Pinterest, run to my supplies, and start cutting without much thought. And more times than I can count, that excitement ended in wasted vinyl, ruined blanks, and hours of frustration.

That’s why I started using a simple craft planning system. Instead of guessing, I take a few minutes to plan before I touch my machine. The difference has been huge: I finish projects faster, I waste far fewer materials, and I actually enjoy crafting again.

I know what it feels like to have a great idea but no plan—and I want to help you skip that frustration and get straight to creating with confidence.

From Overwhelmed to Organized: How Craft Planning Transforms Your Projects

Right now, you might be jumping from idea to idea, spending hours scrolling for inspiration, and wasting supplies on designs that don’t work out. It’s frustrating and discouraging — and it makes crafting feel more like a chore than a joy.

After learning and using this simple craft planning framework, everything changes. You’ll know exactly what you’re making, which graphics and fonts you need, and how to prepare your materials. Instead of feeling rushed or unsure, you’ll feel organized, confident, and excited to create.

This shift saves time, cuts down on wasted materials, and makes your projects smoother from start to finish — so you can get back to the part you love most: crafting.

Helping Busy Crafters Master Craft Planning

Hi, I’m Chaniece, the designer behind Hypnotic Glamour Designs. I create clean, ready-to-cut SVGs for Cricut and Silhouette users who are tired of wasting time cleaning up messy files.

I help busy crafters — especially moms — save time and frustration through high-quality SVGs, helpful tutorials, and simple craft planning strategies. My goal is to make your creative process easier, more organized, and a lot more fun.

Take Your Craft Planning Even Further With My Exclusive SVG Bundle

Ready to put this craft planning framework into action? I’ve created an exclusive SVG bundle to make your next project easier and faster. Each design is clean, ready-to-cut, and perfect for Cricut or Silhouette — no extra cleanup or guesswork required.

I update this bundle regularly with new, high-quality designs so you’ll always have fresh files to work with. Whether you’re making t-shirts, mugs, or wall art, this bundle gives you a head start on your next project and helps you skip the frustration of searching for the right graphics.

Why Craft Planning Makes Every Project Easier and More Enjoyable

What Is Craft Planning

Craft planning is a simple four-step framework that helps you choose a theme, narrow down your project type, pick the right graphics, and select a font before you start creating. It only takes a few minutes, but it saves hours of frustration later.

How Craft Planning Will Make You Feel

When you start using craft planning, you’ll feel calm, confident, and in control of your projects. Instead of scrambling for supplies or second-guessing designs, you’ll have everything ready before you even open your cutting software. That sense of organization and clarity brings back the fun and creativity you’ve been missing.

Why Craft Planning is Important

Without craft planning, it’s easy to waste expensive materials, get stuck in decision-making, or end up with a project that doesn’t look the way you imagined. That frustration can make crafting feel overwhelming instead of enjoyable — and can even stop you from creating altogether.

How to Get Started

You can start implementing this craft planning framework right now using the steps in this post. And to make it even easier, grab my SVG bundle, packed with clean, ready-to-cut designs that fit seamlessly into your projects. It’s the perfect way to save time, avoid frustration, and start crafting with confidence.

My Favorite Resource for Fonts to Use in Craft Planning

One of the biggest struggles crafters face during craft planning is finding the right font for their project. A font can completely change the look and feel of your design, and searching for the perfect one can eat up hours of your time.

That’s why I recommend a yearly subscription to Creative Fabrica. It gives you instant access to thousands of high-quality fonts for every style, season, and occasion — all in one place. You’ll never have to waste time scrolling through free font sites or worrying about commercial licenses again.

When you’re working through your craft planning steps, Creative Fabrica makes the “pick a font” stage easy and stress-free. Instead of hunting for fonts project by project, you’ll already have a massive library at your fingertips.

What’s Your Biggest Craft Planning Challenge?

I’d love to hear from you! Craft planning can look different for everyone, and knowing where you’re feeling stuck helps me create even more helpful content for you.

Which part of craft planning feels like the biggest challenge for you right now?

  • Theme
  • Project type
  • Graphics
  • Fonts

Drop your answer in the comments — just one word is perfect!

Make Craft Planning Even Easier With the Crafty Mom Success Planner

If you want to take your craft planning to the next level, I’ve created the Crafty Mom Success Planner just for you. It’s designed to help busy crafters like you organize projects, plan materials, and keep track of deadlines — all in one simple, easy-to-use planner.

With this planner, you can map out your theme, project type, graphics, and fonts before you even start crafting. It’s a great companion to the four-step framework in this post and will save you time, reduce frustration, and make your creative process more enjoyable.

Grab your free planner today and start planning your next project with confidence!

Take Your Craft Planning Even Further With My SVG Bundle

To make your craft planning even easier, I’ve put together an exclusive SVG bundle designed for crafters who want to skip the guesswork. Every file is clean, ready-to-cut, and works perfectly with Cricut and Silhouette machines.

I update this bundle regularly with new designs, so whether you’re making t-shirts, mugs, wall art, or stickers, you’ll always have fresh, high-quality files ready to go. It’s the perfect way to save time, stay organized, and bring your projects to life faster.

Keep Your Craft Planning Momentum Going With Fonts

Now that you’ve learned the four-step framework for planning your projects, it’s time to level up your designs with the perfect fonts. Fonts can completely change the look and feel of your creations, and having a go-to source makes your craft planning even easier.

Check out my guide on finding and using fonts with a Creative Fabrica yearly subscription to unlock thousands of high-quality, ready-to-use fonts for all your projects. Click the link, explore your options, and make your next craft project stand out with beautiful typography!

Posted on Leave a comment

The Best Valentine’s Day Fonts to Make Your Projects Pop

Love Your Projects, Not the Stress

** Click here to get a free trial and get all these fonts for FREE **

Valentine’s Day is just around the corner, and if you’re anything like me, you’ve already started brainstorming all the adorable, love-filled crafts you want to make. But here’s the thing—sometimes finding the right fonts can feel like searching for love in all the wrong places. That’s why I’ve created a video to make this process as easy and enjoyable as your favorite Valentine’s treat.

Finding My Perfect Match (in Fonts!)

I remember the first time I set out to make a Valentine’s project. I wanted the perfect blend of sweet and whimsical for a card I was making for my kids. But after scrolling through countless fonts that just didn’t “feel right,” I was ready to give up. Then, I discovered some Valentine’s Day-themed fonts that completely transformed my projects—and I can’t wait to share them with you in my latest video.

Stress to Success in No Time

After watching this video, you’ll go from frustrated and overwhelmed to inspired and ready to create stunning Valentine’s Day crafts. Whether you’re making cards, mugs, or t-shirts, you’ll have a go-to collection of fonts that are easy to access and perfect for spreading the love.

Who I Am and Why I’m Here to Help

Hi, I’m Chaniece, the crafter behind Hypnotic Glamour Designs. I help busy moms like you skip the stress and dive right into crafting by sharing tools, tips, and resources that make creating fun and simple. If you’ve ever found yourself staring at a blank screen, unsure of where to start, this video is for you.

Unlock Endless Fonts with Creative Fabrica

If you’re ready to take your Valentine’s Day projects to the next level, there’s no better resource than Creative Fabrica. Their yearly subscription gives you unlimited access to thousands of stunning fonts, including all the romantic, playful, and elegant styles featured in this post.

Plus, Creative Fabrica doesn’t just stop at fonts—you’ll also get access to graphics, SVGs, and other design elements to fuel your crafting creativity all year long. It’s the ultimate tool to keep your projects fresh and exciting without breaking the bank.

Why Valentine’s Day Fonts Matter

Using the right Valentine’s Day fonts will make your projects feel polished, professional, and packed with personality. Plus, you’ll save time by knowing exactly where to find these fonts without all the trial and error.

These fonts are a mix of playful, romantic, and versatile designs that come with beautiful glyphs and extras, perfect for any Valentine’s craft.

Without the right fonts, your projects might not have the cohesive, standout look you’re aiming for. Fonts can make or break a design, and I’m here to help you make sure it’s the right kind of unforgettable.

In the video, I’ll walk you through where to find these fonts, how to access their glyphs, and even how you can grab them for free! (Hint: A Creative Fabrica yearly subscription is a game-changer for crafters like us—more on that in the video.)

Why Creative Fabrica is a Must-Have

If you’re serious about crafting, a Creative Fabrica yearly subscription is hands down the best investment you can make. It gives you access to thousands of fonts (including the Valentine’s Day fonts I showcase) and other design goodies that will save you time and money. Plus, they’re offering a killer deal right now—don’t miss it!

Let’s Talk Fonts

What do you find hardest about picking a font? Let me know in the comments!

Get Organized with My Free Planner

Before you dive into your next project, make sure you’re set up for success with my Crafty Mom Success Planner. It’s free, packed with everything you need to plan your crafts, and the perfect tool to keep your Valentine’s projects on track.

Keep the Inspiration Going

Once you’ve mastered your Valentine’s Day fonts, check out my next video on creating beautiful, clean SVG designs for your crafting projects. You won’t want to miss it!

Posted on Leave a comment

New Years Eve Activities for Kids

Creating Magical New Year’s Eve Memories with Your Kids

As New Year’s Eve approaches, you desire to create a memorable celebration for your kids but face the challenge of finding engaging and age-appropriate activities. The pressure to make the night special can be overwhelming, especially when typical adult festivities aren’t suitable for kids.

Click here for a free and kid-friendly “Drink If” game for NYE.

As a parent and crafting enthusiast, I strive to recreate that magic for my children, ensuring they have a night to remember. get it. The pressure to create a memorable New Year’s Eve for the whole family can be overwhelming. You want something fun and engaging for the kids, but also something that allows you to enjoy the evening too. It can be tough to balance it all.

Imagine a New Year’s Eve filled with laughter, excitement, and precious memories made together. Your kids will be actively participating in fun, age-appropriate activities that create lasting family bonds. This post will give you the ideas to make that happen.

Create Moments through Crafting

Hi, I’m Chaniece from Hypnotic Glamour Designs. I help busy moms like you create beautiful and meaningful moments through crafting. I believe that crafting is more than just making pretty things; it’s about creating memories and connecting with loved ones. And what better time to connect than on New Year’s Eve?

New Year SVG Bundle

To help you make this New Year’s Eve extra special, I’ve created a New Year’s Eve SVG Bundle packed with fun and festive designs you can use for all sorts of kid-friendly projects.

New Year SVG Mini Bundle

$4.99

Light Up Your NYE with the New Year SVG Mini Bundle! ✨ Ditch the boring parties and crowded stores. This year, celebrate with dazzling DIY style! The New Year SVG Mini Bundle is your ticket to crafting one-of-a-kind, unforgettable t-shirts for your entire crew. Imagine matching family threads that sparkle brighter than the fireworks, spreading…

Category:
Tags: ,

Fun and Engaging New Year’s Eve Activities for Kids

These New Year’s Eve activities will help your kids feel excited, engaged, and included in the celebrations. They’ll create a sense of anticipation and fun as you countdown to the new year together. Plus, these activities provide a great opportunity for bonding and creating lasting family memories.

Here are some simple and fun New Year’s Eve activities perfect for kids:

  • Confetti Poppers: These are easy to make with paper rolls, cardstock, and some tape. Kids love the surprise and excitement of popping them at midnight (or an earlier “kid-friendly” midnight — 9 PM over here).
  • Noise Makers: Get ready to make some noise! You can decorate paper plates, cups, or even just use pots and pans to create fun noise makers.
  • Party Hats: No New Year’s Eve celebration is complete without party hats! You can decorate plain hats with glitter, stickers, markers, or even print out fun designs.
  • Headbands: Create sparkly and festive headbands using pipe cleaners, garland, and cardstock.
  • Glasses: Make silly and fun glasses out of construction paper or cardstock.
  • Drink Game (Kid-Friendly): Set up a simple drink game using juice boxes or other non-alcoholic beverages. You can create fun rules or challenges for each round. Don’t want to make your own? You can get my free “Drink If” printable game here –> Free Drinking Game
  • Countdown Clock: Make a paper plate clock with moving hands to help kids visualize the countdown to the new year.

Without engaging activities, children may feel left out of the New Year’s celebrations, leading to boredom and missed opportunities for family bonding. Incorporating these crafts ensures an inclusive and enjoyable experience for all.

Level Up Your Designs with Creative Fabrica Fonts

Speaking of creating amazing designs, I rely heavily on Creative Fabrica for my fonts. Their yearly subscription gives you access to a massive library of fonts perfect for any project. If you’re looking to elevate your designs, I highly recommend checking them out. The right font can make all the difference in your New Year’s Eve activities for kids projects! Here’s some fonts to get you started. Click the logo below to check them out.

CF_horizontal-logo_250px.png

Your Favorite Tradition

What’s your favorite New Year’s Eve tradition with your kids? Leave your answer in the comments.

Get Organized for a Successful Crafting Year

Want even more tips and resources for creating memorable moments with your kids? Download my free Crafty Mom Success Planner to help you stay organized and inspired:

New Year SVG Mini Bundle

$4.99

Light Up Your NYE with the New Year SVG Mini Bundle! ✨ Ditch the boring parties and crowded stores. This year, celebrate with dazzling DIY style! The New Year SVG Mini Bundle is your ticket to crafting one-of-a-kind, unforgettable t-shirts for your entire crew. Imagine matching family threads that sparkle brighter than the fireworks, spreading…

Category:
Tags: ,

Looking Ahead: Valentine’s Day Crafts

As we bid farewell to the New Year’s festivities, it’s the perfect time to start planning for the next celebration—Valentine’s Day! Engaging in Valentine’s Day crafts not only keeps the creative momentum going but also provides an opportunity to express love and appreciation through handmade creations. Click below to get your spot for this free event now.

cupids craft camp
Posted on Leave a comment

5 Days of Christmas Fun: A Festive Countdown with Your Kids

Looking for a magical way to celebrate the days leading up to Christmas? Start new Christmas traditions for kids this year with 5 days of festive fun! Each day has its own theme, and it’s a simple, exciting way to make memories your kids will treasure.

Hi, I’m Chaniece! As a mom and crafter, I’m always searching for meaningful ways to make the holiday season special for my family. This year, I created fun and easy Christmas traditions for kids: 5 Days of Christmas Fun. Each day, we dress up in a new holiday theme, and it’s been such a hit with my kids that I just had to share it with you!

This is perfect for moms looking to add more joy and creativity to their holiday celebrations without a ton of effort.

Plan the Most Magical Christmas Yet

Feeling inspired to start your own Christmas traditions? My free Crafty Mom Success Planner is here to help you organize your ideas, plan activities, and make this holiday season unforgettable. Whether you’re prepping crafts, outfits, or family fun, this planner is the perfect companion.
[???????? Download it for free below!]

The 5 Themes:

  1. Holiday Colors
    • Celebrate the season by wearing red, green, white, gold, or silver! Want to make it extra special? Have your kids design their own holiday t-shirt using iron-on vinyl or fabric markers. (Check out my affiliate partner, Creative Fabrica, for amazing fonts and patterns perfect for DIY shirts and crafts!)
  2. Holiday Socks
    • Pull out those funky Christmas socks or get crafty! Decorate plain socks with fabric paint, glitter, or pom-poms. Turn this into a bonding moment by letting your kids personalize their own socks.
  3. Holiday Headwear
    • Santa hats, reindeer antlers, or even a DIY elf headband can bring this day to life. If you’re feeling creative, use hot glue, pipe cleaners, and felt to craft unique headwear for each family member.
  4. Holiday Attire
    • Go all out with Christmas sweaters, festive dresses, or costumes. Bonus points for matching family outfits or holiday-themed onesies!
  5. Holiday PJs
    • End the week on a cozy note with matching Christmas pajamas. Curl up for a family movie night with hot cocoa and your favorite holiday treats. Snap a photo to capture the memory and maybe even start a yearly scrapbook tradition!

Why This Works as Christmas Traditions for Kids

Starting small traditions like this makes the holiday season more memorable and meaningful. Dressing up each day gives kids something to look forward to and fosters excitement for Christmas morning.

By tying these daily themes to simple crafts, movies, or activities, you create even more opportunities to bond with your kids and make the most of the holiday season.

Get Creative with Fonts and Patterns!

Need help designing DIY t-shirts, headbands, or holiday crafts? Creative Fabrica’s yearly subscription gives you access to thousands of premium fonts and patterns. Whether you’re customizing holiday décor or creating matching shirts for the family, their resources make every project easier.

Tips for Success

Pair each theme with a fun activity, like baking cookies on Holiday Colors day or reading Christmas stories in your PJs.Let your kids take the lead! They’ll love choosing outfits, decorating socks, or crafting headwear.Capture the memories! Snap photos of each day to create a keepsake or share on social media.

What’s Your Favorite Christmas Traditions for Kids?

I’d love to hear your ideas! Comment below with your favorite traditions or which of these themes you’re most excited to try.

PS: Looking to make your holiday crafting easier? Check out my Christmas SVG bundle for cute designs perfect for stockings, shirts, and more. Grab it here!

Christmas SVG Bundle

$12.00

All of your favorite Christmas SVGs in one bundle. A total of 16 holiday-themed designs. Get it now to make a holiday DIY project to have on Christmas.

Category:
Tags: , ,
Posted on Leave a comment

Ultimate Back-to-School Design Guide

Back-to-school shopping can be a stressful experience. You want to create personalized and unique items for your child, but finding inspiration and time can be a challenge. Imagine sending your child to school with one-of-a-kind supplies that reflect their personality and style.

The Design Dilemma

Like many busy moms, I’ve spent countless hours scrolling through Pinterest, searching for that perfect back-to-school design inspiration. The endless possibilities can be overwhelming, and it’s easy to get lost in a sea of ideas without a clear direction. I know the feeling of staring at a blank canvas, wishing for that magical spark of creativity. Let’s change that together!

From Overwhelm to Custom Creations

Imagine transforming ordinary school supplies into personalized masterpieces that reflect your child’s unique style. With our easy-to-follow design guide, you’ll go from feeling overwhelmed to crafting with confidence. Say goodbye to generic school items and hello to one-of-a-kind creations!

Overcoming the Back-to-School Design Challenge

As a busy mom who loves crafting, I understand the struggle of creating unique and personalized items for my kids. That’s why I’m here to help you transform ordinary school essentials into extraordinary masterpieces. Let’s dive into the world of back-to-school design together!

Back to School SVG Bundle

Unleash your creativity with our Back-to-School SVG Bundle! Packed with adorable designs, this bundle is your secret weapon for creating personalized school supplies. From backpacks to lunchboxes, transform ordinary items into extraordinary keepsakes.

With my SVGs, you’ll:

  • Save time on design
  • Access a variety of cute and trendy designs
  • Create unique and personalized school items

Ready to elevate your back-to-school crafting game? Grab your bundle today!

Teacher SVG Bundle

$5.00

This is a digital item. Instant download. No physical item will be shipped. Unlimited downloads. This design is perfect on t-shirts, totes, mugs, and much more. Compatible with Cricut Design Space and other cutting software. This product is 9 files in each of the following formats: SVG PNG – High quality 300 dpi DXF EPS…

Back to School Design Guide

Imagine the satisfaction of sending your child to school with personalized, one-of-a-kind supplies. By following this design guide, you’ll create pieces that reflect your child’s unique personality and spark joy with every use. Say goodbye to generic store-bought items and hello to customized creations that will make heads turn.

This 5-step design framework is your roadmap to crafting personalized back-to-school essentials. By breaking down the design process into manageable steps, you’ll discover how easy it is to create stunning pieces that you and your child will love.

Investing time in designing your child’s school supplies goes beyond aesthetics. Personalized items can boost your child’s confidence and create a sense of ownership. Plus, it’s a fun and rewarding way to spend quality time with your family.

Ready to dive in? Follow these steps to transform your crafting ideas into reality:

  1. Pick Your Theme: Choose a theme that resonates with your child’s interests.
  2. Select Your Fonts: Choose fonts that complement your theme and create a cohesive look. Here’s some great ideas: Back to School Fonts
  3. Choose Your Graphics (SVGs): Incorporate relevant graphics to bring your design to life. –> Back to School SVG bundle
  4. Select Your Color Palette: Create a visually appealing color scheme that matches your theme. Ex. School colors or your child’s favorite colors.
  5. Develop a Catchy Phrase: Add a personal touch with a memorable slogan. Something funny or witty. Ex: Oh Snap School’s Back

By following this framework, you’ll create personalized school supplies that are as unique as your child.

Need help finding your perfect font match?

Creative Fabrica offers a vast library of high-quality fonts for every occasion. From playful scripts to bold sans-serifs, you’ll find the perfect font to match your style. As an affiliate, I can offer you exclusive discounts on your subscription. Click below to explore their font collection and unlock your design potential.

Share Your Design Favs

What’s your favorite school supply to personalize? Let me know in the comments below.

Leave a Reply

Your email address will not be published. Required fields are marked *

Crafty Mom Success Planner

Want to stay organized and motivated on your crafting journey? Grab your FREE Crafty Mom Success Planner filled with tips, checklists, and inspiration to help you bring your creative visions to life.

Free Craft Planner

Don’t forget to grab your free Craft Planner, equipped with brainstorm sheets, holiday calendars, project organizers, and daily planners. It’s designed to simplify multi-step craft projects and fit seamlessly into your busy schedule.

Back to School SVG Bundle

Ready to bring your back-to-school designs to life? Our Back-to-School SVG Bundle is packed with adorable and versatile graphics to elevate your creations. With ready-to-use designs, you can spend less time searching and more time crafting.

Grab your bundle now and start creating personalized school supplies that will make heads turn!

Teacher SVG Bundle

$5.00

This is a digital item. Instant download. No physical item will be shipped. Unlimited downloads. This design is perfect on t-shirts, totes, mugs, and much more. Compatible with Cricut Design Space and other cutting software. This product is 9 files in each of the following formats: SVG PNG – High quality 300 dpi DXF EPS…

What’s Next?

Want a sneak peek at our amazing Back-to-School SVG Bundle? Stay tuned for an exclusive reveal coming soon! Hop on the VIP list to be the first to know when it launches.

Posted on Leave a comment

Best Cricut File Format for Back to School Crafts

Are you tired of spending more time fixing files than crafting with your Cricut? Imagine starting your next back-to-school project without the hassle of complex file conversions or unexpected errors.

Crafting Without Complications: My Journey to Simplifying SVG Files

As a busy crafter and mom, I understand the frustration of juggling intricate SVG files that don’t quite work as expected. That’s why I’ve dedicated myself to creating clean SVGs that save time and make crafting enjoyable again.

From File Frustration to Seamless Crafting

Imagine transforming your crafting experience. Instead of spending hours cleaning up complicated files, you effortlessly upload a clean SVG and start crafting immediately. No more last-minute fixes or wasted materials—just smooth, stress-free crafting sessions.

How I Help and Who I Help

At Hypnotic Glamour Designs, I specialize in providing busy mom crafters with high-quality SVG files that are ready to cut. Whether you’re a seasoned crafter or just starting, our SVGs are designed to fit seamlessly into your crafting process.

Back to School SVG Bundle

Explore our exclusive SVG bundle below. It’s carefully crafted to personalize your child’s school supplies with ease. Each SVG is tested to ensure compatibility with Cricut machines, so you can create without any technical hurdles.

Teacher SVG Bundle

$5.00

This is a digital item. Instant download. No physical item will be shipped. Unlimited downloads. This design is perfect on t-shirts, totes, mugs, and much more. Compatible with Cricut Design Space and other cutting software. This product is 9 files in each of the following formats: SVG PNG – High quality 300 dpi DXF EPS…

Benefits of Using the Best Cricut File Format

Benefits of choosing clean SVG files:

  • Save You Time and Frustration: Spend less time fixing file errors and more time crafting.
  • Ensure Smoother Crafting Sessions: No interruptions due to incompatible files or complicated layers.
  • Increase Your Crafting Productivity: Complete projects faster with high-quality results.

The Consequences of Choosing the Wrong File Format

Choosing the wrong file format can lead to:

  • Wasted Time on File Conversions: Hours spent converting files from raster formats to SVG.
  • Errors During Cutting or Printing: Unexpected cuts or prints that ruin materials and projects.
  • Incomplete or Flawed Crafting Projects: Frustration from projects not turning out as expected.

High-Quality Fonts for Your Crafting Needs

Enhance your designs with unique fonts through our affiliate partnership with Creative Fabrica. Explore a variety of fonts that complement your crafting projects.

Creative Fabrica's Christmas in July - Affiliates - All Access -1080x1080.jpg

What back-to-school item will you be personalizing this year?

Share your plans in the comments below!

Free Craft Planner

Don’t forget to grab your free Craft Planner, equipped with brainstorm sheets, holiday calendars, project organizers, and daily planners. It’s designed to simplify multi-step craft projects and fit seamlessly into your busy schedule.

What’s Next

Stay tuned for our upcoming blog post on “5 Ways to Personalize Your Child’s School Supplies Using SVGs”. Discover creative ideas to make this school year extra special with personalized crafts!

Posted on Leave a comment

Create Your Own SVG for Christmas

Want to create your own SVG for Christmas like this but don’t know where to start?

WATCH THE FREE CUSTOM CRICUT DESIGNS TRAINING to go deeper into my design framework

I’m Chaniece an SVG designer who helps crafters like you create your own SVG for Christmas crafts with a simple and easy-to-follow 5-step framework. In this post, I’ll guide you through a simple 5-step framework that will have you create your own SVG for Christmas in just minutes.

By the end of this post, you’ll have the confidence you need to get started creating your own SVG for Christmas crafts today.

Step 1: Pick a Theme – Ignite Your Vision

This is defining the overall mood and style you want to achieve for your design. Or specifically, who are you creating this design for?

A clear theme is the foundation — the most important part of the process, and provides a roadmap for your design, ensuring all elements are cohesive and communicate your desired message.

The theme you pick should create a sense of direction and spark your creative fire, igniting excitement and anticipation for the design process.

Here are some ideas of themes you can use:

  • Cozy Cabin Christmas: Imagine rustic snowflakes on woodgrain ornaments, twinkling fairy lights, and personalized stockings with initials.
  • Winter Wonderland Magic: Think glistening snowflakes, shimmering icicles, playful reindeer frolicking in snowy landscapes.
  • Whimsical Wonderland: Let your imagination run wild with gingerbread houses, dancing penguins, and adorable elves in candy cane stripes.

Envision your Christmas tree adorned with snowflakes cut from woodgrain-textured vinyl, cozy plaid ornaments with your family’s initials, and warm LED lights adding a charming glow.

Step 2: Pick Graphics – Let Visuals Speak

Select visually appealing graphics that complement your theme and add personality to your design. Imagine glittering snowflakes, whimsical reindeer, or a classic Santa silhouette.

Carefully chosen graphics enhance the visual appeal and message of your design, making it instantly recognizable and impactful. They open a world of creative possibilities, allowing you to experiment with different combinations and express your unique style.

Here’s a quick way to find the exact graphics that you want for your project. Say for example, you want to use a snowflake, ornament, and Christmas tree in your design. You specifically want SVG files, so on a graphics site such as creativefabrica.com or in my shop, in the search bar you will put the graphic + the file type (separated by a space) to get the search term. See the example below.

Pro Tip: Don’t choose more than 3 graphics, so you don’t get decision fatigue or clutter your design.

Ideas of Christmas SVGs you can choose are:

  • Classic Elegance: Choose elegant serif fonts for crafts like timeless ornaments and gift tags.
  • Playful Charm: Opt for fun script fonts and adorable cartoon characters to bring whimsy to your decorations or gifts for family and friends.
  • Modern Chic: Experiment with geometric shapes, metallic accents, and bold graphic elements for a sleek and stylish look.

Picture yourself finding beautiful SVGs of snowflakes with delicate details and a playful reindeer with a Santa hat perched on its antlers, then download them and import them into Cricut Design Space with excitement.

Step 3: Pick Fonts – Let Words Dance

Choose fonts that complement your graphics and theme, adding a touch of personality and elegance to your design. Think playful script, bold serif, or whimsical hand-lettering.

Fonts help set the tone of your design and ensure readability, making your message clear and impactful.

Here’s some ideas:

  • Elegant and Serene: Choose serif fonts with delicate details for warmth and sophistication. Think flowing script for personalized messages and classic block fonts for bold headlines.
  • Playful and Fun: Embrace hand-drawn bubble fonts for a whimsical feel. Experiment with chunky block letters for a playful vibe and consider festive script fonts for personalized elements.
  • Modern and Stylish: Opt for sans-serif fonts with clean lines and geometric shapes for a contemporary look. Choose bold statement fonts for eye-catching designs and sleek script fonts for a touch of elegance.

Picking fonts gives you an opportunity to express your creativity through typography, fostering a sense of accomplishment and satisfaction with the design’s aesthetic.

Christmas Font Ideas

You’ve chosen a charming script font for your personalized ornaments and a classic serif font for her “Merry Christmas” banner. You’ve experimented with sizes and colors and found the perfect balance to complement your chosen graphics.

Step 4: Pick Colors – Let Emotions Flow

Select a color palette that evokes the desired emotions and complements your theme. Imagine warm reds and greens, cool blues and whites, or a mix of metallics and festive hues.

Colors play a powerful role in creating a mood and atmosphere, making your design emotionally resonant and visually appealing.

The colors you choose allow you to tap into your creativity and express yourself, leading to a sense of pride and satisfaction with the design’s emotional impact.

Colors you can choose include:

  • Warm and Cozy: Create a nostalgic Christmas atmosphere with rich reds, deep greens, and warm gold accents. Think twinkling fairy lights, gingerbread hues, and rustic wood textures.
  • Cool and Serene: Capture the magic of winter with icy blues, shimmering silvers, and crisp whites. Embrace snowflakes with frosty gradients, icicles with a sparkling touch, and soft winter landscapes.
  • Bold and Festive: Don’t be afraid to play with unexpected color combinations like vibrant pinks, turquoises, and lime greens for a fun and festive twist. Think candy cane stripes, playful polka dots, and metallic splashes for a dazzling effect.

Imagine that you’ve opted for warm reds and greens for your ornaments, evoking a cozy fireplace feel. You’ve chosen a touch of silver for the snowflakes and a bright gold for the reindeer’s hat, adding a festive sparkle.

Step 5: Pick a Phrase – Make it Personal!

Crafting a catchy and meaningful phrase that resonates with your theme and audience, adding a personalized touch to your design. Imagine “Merry & Bright,” “Home for the Holidays,” or a heartfelt message for loved ones.

Engaging phrases enhance the message of your design and make it more memorable, adding another layer of connection to your audience.

Custom phrases provide an opportunity to express your personality and creativity through words, leading to a sense of self-expression and satisfaction with your design’s personal touch.

You can use phrases like the following, depending on the goal of your project.

  • Heartfelt Greetings: Spread holiday cheer with classic messages like “Merry Christmas!” or “Happy Holidays!” Personalize with family names or inside jokes for an extra special touch.
  • Catchy and Creative: Craft playful phrases like “Jingle All the Way” or “Dashing Through the Snow” to add a touch of humor. Consider incorporating lyrics from your favorite Christmas carols for a musical twist.
  • Special Dates and Names: Incorporate birthdays or anniversaries into your designs for unique and meaningful gifts.

Picture personalizing your ornaments with each family member’s name and the year. She creates a banner that reads “Home for the Holidays, Love the [Family Name],” filling your heart with joy as you picture their delighted faces on Christmas morning.

Putting it all together

Now let’s put all this together to come up with our design concept.

  1. Theme – Traditional
  2. Graphics – Ornaments and Snowflakes
  3. Font – Butter & Garlic
  4. Colors – Red, Green, and Gold
  5. Phrase – Seasons Greetings

Design with Confidence

By following these 5 steps, you’ll gain the skills and confidence to design stunning and unique Christmas SVGs that transform your holiday decorations and gifts into something truly magical. You’ll be able to:

  • Create personalized gifts that are truly unique and meaningful.
  • Design decorations that reflect your individual style and taste.
  • Express your creativity and bring joy to others during the holiday season.
  • Save money by crafting your own decorations and gifts.
  • Impress your friends and family with your artistic talents.

Bring your design to life

Ready to put together these elements and bring your design to life as you see below? Then enroll in my course “Create Your Own Design in 5 Days” where you’ll learn the essential tools needed to create custom designs, like this from scratch in Cricut Design Space.

Posted on Leave a comment

Christmas Money Card Holder Design Guide

Ready to design your own money card holders for Christmas but don’t know where to start?

Hi, I’m Chaniece from HGD, an SVG designer that helps crafters just like you create custom designs for their Christmas money card holders with a simple 4 step framework.

By the end of this blog post, you’ll transform from a creative crossroads to confidently brainstorming unique Christmas money card designs in just minutes. So, grab your pen and paper, and let’s get started on this joyful journey!

But before we dive in, don’t forget to snag your free Christmas SVG waiting for you below. It’s a little gift from me to give you an even faster shortcut and kickstart your holiday crafting spirit. Click below to get it now.

4 Step Framework

Step 1: Pick your graphics

Choosing the right graphics is like selecting ornaments for your Christmas tree. Think symbols of the season – a Christmas tree, an ornament, or a delicate snowflake. A few more examples of Christmas graphics you can use include: Santa Claus, reindeer, and Christmas trees.

These graphics lay the foundation for a design that resonates with the spirit of the holidays.

As you pick graphics, envision the joy they’ll bring to your recipients. Each graphic tells a story, adding a personal touch that warms hearts and creates lasting memories.

Many crafters, just like you, have transformed their designs with carefully chosen graphics.

Step 2: Pick your fonts

Fonts are the unsung heroes of design. Consider ‘Butter & Garlic‘ – a delightful choice reminiscent of handwritten holiday cards. Fonts add character and charm to your creation, enhancing the overall aesthetic.

Choosing the right font evokes nostalgia and warmth, turning a simple card into a cherished keepsake. It’s the detail that makes your creation uniquely yours. Also, take in mind your recipient when choosing your font. Script fonts give an more elegant touch while handwritten are more playful.

Crafters who’ve embraced ‘Butter & Garlic‘ rave about the personalized feel it adds to their designs. Join the chorus of satisfied creators!

Want to dive even deeper into this framework? Take my free masterclass below.

Step 3: Pick your colors

Dive into the Christmas color palette – red, green, and gold. These hues evoke the festive spirit, instantly transporting your creation into a winter wonderland. But you can also experiment with more unconventional color palettes to express unique style.

Colors set the mood and atmosphere. Picture the delight on your recipient’s face as they unwrap a money card holder adorned in festive shades – it’s the magic of the season captured in color.

Experimenting with different color combinations can help you to find a palette that matches your recipients personal preferences and the overall theme of the Christmas money card holder.

Step 4: Pick your phrase

Add a touch of sentiment with a seasonal greeting like “Season’s Greetings.” Your chosen phrase is the bow that ties your entire creation together, conveying warm wishes and spreading holiday cheer.

Phrases infuse your money card holder with emotion and help you to create a money card holder that is both meaningful and memorable. It’s a simple yet powerful way to communicate love, joy, and the spirit of giving. Here are some examples of other phrases you can use: “Merry Christmas,” or “Happy Holidays,”. You can also choose more personal phrases like “To my dearest family” or “With love from the Smiths.”

Choosing the right phrases can help you to express your feelings for the person you are giving the money card holder to. It can also help you to create a money card holder that will be cherished for years to come.

Practical exercise

Now, let’s put theory into practice! For my Christmas money card holder. Take a moment to select one graphic, one font, one set of colors, and one phrase for your Christmas money card holder.

Here’s what I came up with—

Overall, the four steps in this framework can help you create Christmas money card holders that are both stylish and meaningful. By choosing the right graphics, fonts, colors, and phrases, people can create card holders that will be cherished by the people you give them to.

Ready for more tips on creating Christmas money card holders? Dive into the video playlist below and let the crafting magic begin!