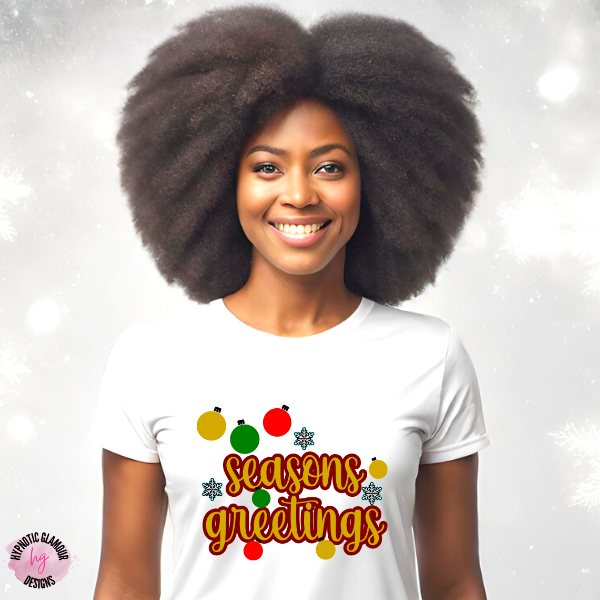
Want to create your own SVG for Christmas like this but don’t know where to start?


I’m Chaniece an SVG designer who helps crafters like you create your own SVG for Christmas crafts with a simple and easy-to-follow 5-step framework. In this post, I’ll guide you through a simple 5-step framework that will have you create your own SVG for Christmas in just minutes.
By the end of this post, you’ll have the confidence you need to get started creating your own SVG for Christmas crafts today.
This is defining the overall mood and style you want to achieve for your design. Or specifically, who are you creating this design for?
A clear theme is the foundation — the most important part of the process, and provides a roadmap for your design, ensuring all elements are cohesive and communicate your desired message.
The theme you pick should create a sense of direction and spark your creative fire, igniting excitement and anticipation for the design process.
Here are some ideas of themes you can use:
Envision your Christmas tree adorned with snowflakes cut from woodgrain-textured vinyl, cozy plaid ornaments with your family’s initials, and warm LED lights adding a charming glow.
Select visually appealing graphics that complement your theme and add personality to your design. Imagine glittering snowflakes, whimsical reindeer, or a classic Santa silhouette.
Carefully chosen graphics enhance the visual appeal and message of your design, making it instantly recognizable and impactful. They open a world of creative possibilities, allowing you to experiment with different combinations and express your unique style.
Here’s a quick way to find the exact graphics that you want for your project. Say for example, you want to use a snowflake, ornament, and Christmas tree in your design. You specifically want SVG files, so on a graphics site such as creativefabrica.com or in my shop, in the search bar you will put the graphic + the file type (separated by a space) to get the search term. See the example below.
Pro Tip: Don’t choose more than 3 graphics, so you don’t get decision fatigue or clutter your design.
Ideas of Christmas SVGs you can choose are:
Picture yourself finding beautiful SVGs of snowflakes with delicate details and a playful reindeer with a Santa hat perched on its antlers, then download them and import them into Cricut Design Space with excitement.
Choose fonts that complement your graphics and theme, adding a touch of personality and elegance to your design. Think playful script, bold serif, or whimsical hand-lettering.
Fonts help set the tone of your design and ensure readability, making your message clear and impactful.
Here’s some ideas:
Picking fonts gives you an opportunity to express your creativity through typography, fostering a sense of accomplishment and satisfaction with the design’s aesthetic.
You’ve chosen a charming script font for your personalized ornaments and a classic serif font for her “Merry Christmas” banner. You’ve experimented with sizes and colors and found the perfect balance to complement your chosen graphics.
Select a color palette that evokes the desired emotions and complements your theme. Imagine warm reds and greens, cool blues and whites, or a mix of metallics and festive hues.
Colors play a powerful role in creating a mood and atmosphere, making your design emotionally resonant and visually appealing.
The colors you choose allow you to tap into your creativity and express yourself, leading to a sense of pride and satisfaction with the design’s emotional impact.
Colors you can choose include:
Imagine that you’ve opted for warm reds and greens for your ornaments, evoking a cozy fireplace feel. You’ve chosen a touch of silver for the snowflakes and a bright gold for the reindeer’s hat, adding a festive sparkle.
Crafting a catchy and meaningful phrase that resonates with your theme and audience, adding a personalized touch to your design. Imagine “Merry & Bright,” “Home for the Holidays,” or a heartfelt message for loved ones.
Engaging phrases enhance the message of your design and make it more memorable, adding another layer of connection to your audience.
Custom phrases provide an opportunity to express your personality and creativity through words, leading to a sense of self-expression and satisfaction with your design’s personal touch.
You can use phrases like the following, depending on the goal of your project.
Picture personalizing your ornaments with each family member’s name and the year. She creates a banner that reads “Home for the Holidays, Love the [Family Name],” filling your heart with joy as you picture their delighted faces on Christmas morning.
Now let’s put all this together to come up with our design concept.
By following these 5 steps, you’ll gain the skills and confidence to design stunning and unique Christmas SVGs that transform your holiday decorations and gifts into something truly magical. You’ll be able to:
Ready to put together these elements and bring your design to life as you see below? Then enroll in my course “Create Your Own Design in 5 Days” where you’ll learn the essential tools needed to create custom designs, like this from scratch in Cricut Design Space.