Are you looking for a heartfelt and personalized gift idea for Father’s Day?
Father’s Day is the perfect occasion to show the special dads in your life how much you care. In this step-by-step guide, I’ll walk you through the process of creating your own homemade money card holder. With just a few materials and some creativity, you’ll have a unique and meaningful gift ready to impress. Let’s get started!
To begin, download your free copy of the Money Card Holder Starter Guide. This guide will provide you with all the materials you need to get started.
Now it’s time to unleash your creativity! Select the graphics, fonts, and colors that best represent the dad’s personality and interests. Personalize the design to make it truly unique and meaningful.
If you have trouble with this step, check out my free money card holder training that breaks down all of these frameworks and shows you how to pick each of these in just minutes.
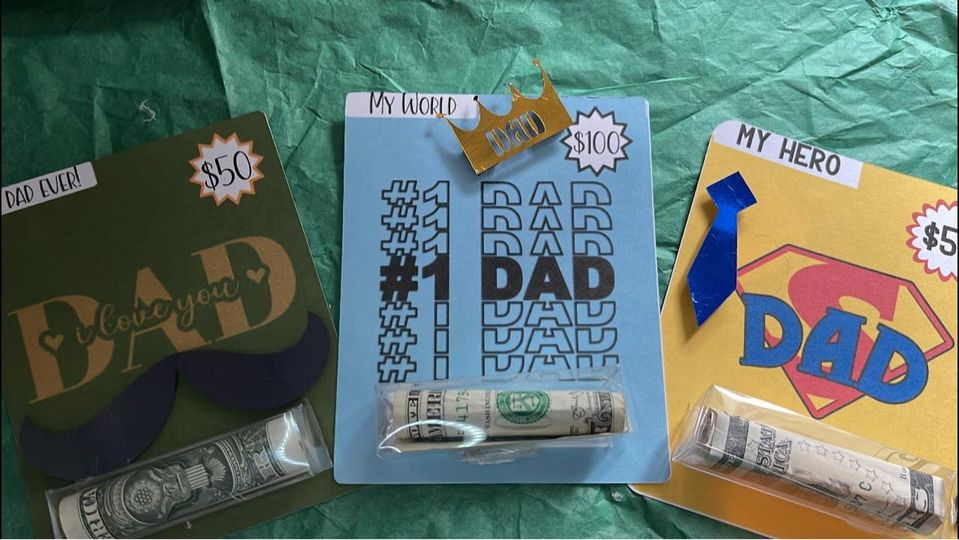
A. Pick Your Graphics: Choose images or illustrations that reflect the dad’s hobbies, passions, or favorite symbols. Consider using Father’s Day-themed elements to add an extra touch of celebration. You can find these for free in the Free SVG library.
B. Pick Your Fonts: Select fonts that complement the overall design and convey the desired message. Opt for a combination of fonts (also known as font duos) to add visual interest and ensure readability. Click below to get some examples of fonts you can use.
C. Pick Your Colors: Use a color scheme that resonates with dad’s preferences or matches the theme of the homemade money gift card holder. Consider incorporating shades that evoke warmth and appreciation.
Transfer your chosen design elements to Cricut Design Space, a user-friendly software that allows you to bring your ideas to life. Upload the graphics, customize the text, and arrange everything according to your desired layout.
Once you’re satisfied with the design, ensure all elements are properly aligned and grouped together. Flatten the design for the print then cut process.
Load your cardstock (preferably 110 lb) into your printer and print the flattened design. Make sure the print quality is set to high and the bleed is turned on for optimal results. Once printed, load the printed cardstock onto your cutting machine and let it work its magic. Watch as your design comes to life with precision and detail.
Download the free lip balm box SVG to hold the money. Upload the file to Cricut Design Space and follow the instructions in the instructional video to format the file before cutting. Then, cut out the box. Now, attach the lip balm box SVG to the front of the homemade money card holderin the designated spot using glue. This will provide a unique and functional display for the money.
Finally, insert the desired amount of money into the lip balm box attached to the homemade money card holder. Seal the box to ensure the bills are securely held in place. Consider adding a heartfelt note or a personal message to the message box in the upper left of the card to complete the Father’s Day surprise.
Congratulations! You’ve successfully created a homemade money card holder for Father’s Day. This heartfelt and practical gift will surely bring a smile to any dad’s face. Remember, the joy is not only in the final product but also in the thought and effort you put into creating something unique and meaningful. Get creative, have fun, and enjoy the satisfaction of giving a handmade gift from the heart. Happy crafting and Happy Father’s Day!